Laman

Rabu, 28 Januari 2015

is Assassin’s Creed headed to Japan in 2016?

Assassin's Creed Japan header
When Assassin’s Creed Unity launched late last year, fans were shocked to discover that the game they’d been waiting for didn’t appear to have completed development. A huge amount of bugs made Unity unplayable, from the frustrating (loot chests being inaccessible without a connection to Ubisoft‘s servers and Ubisoft’s poor server connections) to the downright comical (character faces disappearing and NPCs randomly showing up in cutscenes). There were also framerate drops that went against Ubisoft’s promises that the game would run at 900p and 30FPS on PS4 and Xbox One. It was rushed and it wasn’t good.

As a result, a lot of those very same assassins to be were then appalled a few weeks later when Ubisoft confirmed that leaked info and images of a new Assassin’s Creed game called Assassin’s Creed Victory (which will be set in Victorian London) were legitimate. It wasn’t so much that Ubisoft is already working on another Assassin’s Creed game because everyone is aware that AC games are created alongside one another (see: Unity and Rogue), but it was frustrating to learn that another new game world was being developed as Unity’s development suffered.
So the suggestion that yet another flagship Assassin’s Creed is in development, or more specifically, the timing of such a suggestion may be cause for more community frustration. In this case it may also be cause for some excitement since fans have long clamored for Ubisoft to make an Assassin’s Creed game that’s set in Japan – and the publisher and developer may be working on that after all.
That’s what an official Assassin’s Creed Unity collectible leads us to believe, anyway. Writing on the Ubisoft forum, user Cornik22 explains that they bought the Assassin’s Creed Unity: The Complete Official Guide back in November but a recent re-read of the book turned up some interesting information. It showed off a concept of the Abstergo foyer that has never made it into a final release of an AC game, but it’s significant as it actually hints at future Assassin’s Creed locations.
Assassin's Creed Abstergo display
Included in the image are photos of the Santa Maria del Fiore in Florence (Assassin’s Creed 2), a tropical island (Assassin’s Creed IV: Black Flag), the Notre Dame (Assassin’s Creed Unity), the Houses of Parliament (Assassin’s Creed Victory) and another image which appears to be of the Sensoji Temple in Japan. It’s also worth noting that Cornik22 also saw this mural in other AC collectibles, including the Abstergo Entertainment: Employee Handbook, The Art of Assassin’s Creed IV: Black Flag, so clearly this isn’t a fluke.
Assassin's Creed Sensoji Temple
The similarities in the side-by-side comparison of the Abstergo display and the Sensoji Temple (above) are uncanny. Some have suggested that it may be a nod to the Forbidden City in China (Assassin’s Creed Chronicles: China will be launching early 2015) but details such as the color and shape of the roofs and the unmistakable lines of the Sensoji Temple’s balcony suggest that it really is a nod to Japan. When it comes to historical accuracy, Ubisoft always pays close attention to detail so it’s unlikely that they would depict the Forbidden City so incorrectly.
Total War Shogun

Why Assassin’s Creed Should Go to Japan

With Assassin’s Creed Victory scheduled for 2015, the next Assassin’s Creed Japan is expected for fall 2016 but if Ubisoft is exploring Japan in a future adventure, it could be one of the series’ most exciting and unique entries yet. That’s because any Assassin’s Creed game in Japan would most likely be set during the Edo period that spanned 17th, 18th and 19th centuries. It was a time of serious hardships for the Japanese people, including conflicts, famine and oppressive rule under Tokugawa shoguns (Japan’s feudal military rulers) and freedom and liberation have been recurring themes in every Assassin’s Creed game.
Assassin’s Creed Japan would likely be set in either the 17th or the 18th centuries too. as these were the worst and the most eventful times during the Edo period prior to the final fall of the Tokugawa dynasty in 1868.
The 17th century contains several pro-freedom events for Ubisoft to cover. The entire Edo period saw strict laws enforced where Western principles and teachings were banned, most notably the ban of Christianity 1614, the ban of foreign travel and reading foreign books in 1633 and the ban of ship building in 1638. There was the Shimabara Rebellion that took place in 1638 as overtaxed peasants and ‘chonin’ (feudal Japan’s working class) looked to break out against the persecution. The rebellion was ultimately crushed (the Tokugawa Shogunate sent over 125,000 soldiers to deal with them) but it certainly lays a convincing, oppressive stage for our AC Japan protagonist to perform on.
18th century Japan was more eventful still as that included the Horeki River Improvement Incident in 1754 (where the Tokugawas forced the Satsumas to carry out impossible work to stop the country’s rivers from flooding); the rule of Tokugawa Ieshige who let corruption run rampant from 1745 to 1760; and the Great Tenmei famine of 1782-88. And, as Assassin’s Creed is always big on including notable figures, the artist Hokusai (who was essentially the Japanese Da Vinci) who was born in 1760 would be a good choice.
Assassin's Creed Japan concept

Could Assassin’s Creed Japan Really Happen?

Evidently, the problem with featuring Japan in an Assassin’s Creed game is that unless Ubisoft goes down the legacy route like they did with Connor, Haytham and Edward Kenway (in AC3 and 4, respectively) it would be difficult to pack those two centuries into one game. In theory, they could just split Assassin’s Creed Japan into two games but as people already feel that the Assassin’s Creed games lack freshness, two games set in the same place but in slightly different years might be overkill.

Minggu, 25 Januari 2015

GTA V PC version Release


hanomangame.blogspot.com
Trouble taps on your window again with this next chapter in the Grand Theft Auto universe, set in the city of Los Santos and its surrounding hills, countryside and beaches. A bold new direction in open-world freedom, storytelling, mission-based gameplay and online multiplayer, Grand Theft Auto V focuses on the pursuit of the almighty dollar in a re-imagined, present-day Southern California.
Los Santos: a sprawling sun-soaked metropolis full of self-help gurus, starlets and fading celebrities, once the envy of the Western world, now struggling to stay afloat in an era of economic uncertainty and cheap reality TV.
Amidst the turmoil, three very different criminals plot their own chances of survival and success: Franklin, a street hustler looking for real opportunities and serious money; Michael, a professional ex-con whose retirement is a lot less rosy than he hoped it would be; and Trevor, a violent maniac driven by the chance of a cheap high and the next big score. Running out of options, the crew risks everything in a series of daring and dangerous heists that could set them up for life.

Release Date: March 24, 2015
M for Mature: Blood and Gore, Intense Violence, Mature Humor, Nudity, Strong Language, Strong Sexual Content, Use of Drugs and Alcohol, Includes online features that may expose players to unrated user-generated content

Kamis, 22 Januari 2015

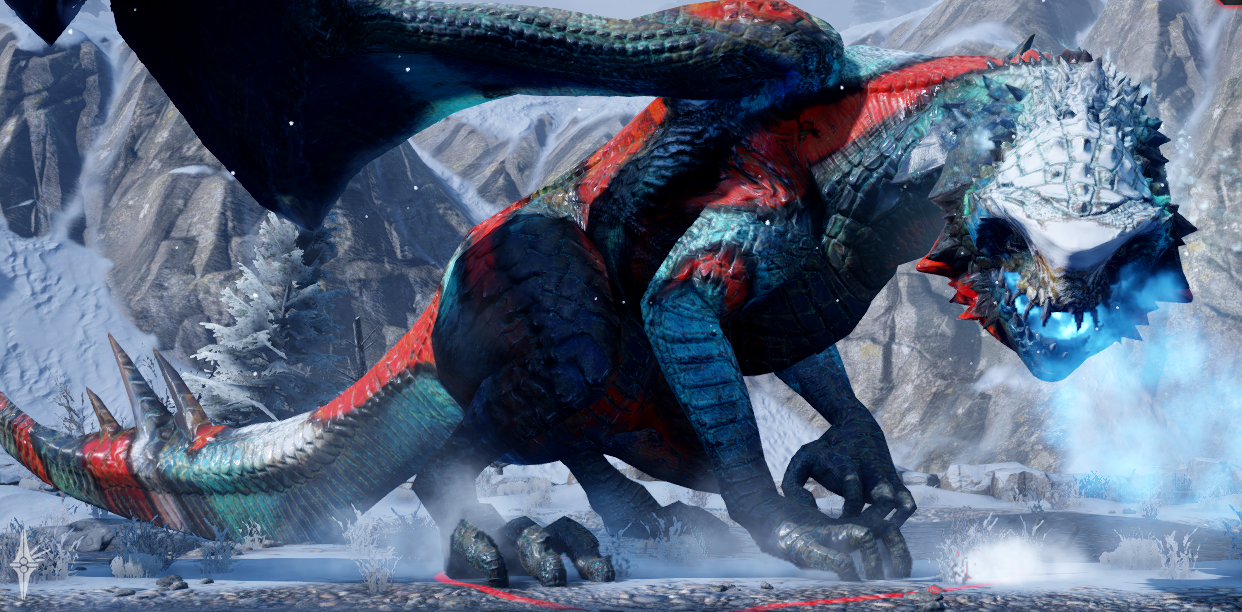
Find All Dragon , Dragon Age : inquisition Tenth Dragon The Highland Ravager

 
Highland Ravager is one of the 10 High Dragons in Dragon Age 3: Inquisition. You will acquire the Wyrmslayer Trophy/Achievement if you kill all ten of them. Must finish “Restore Judicael’s Crossing” operation first

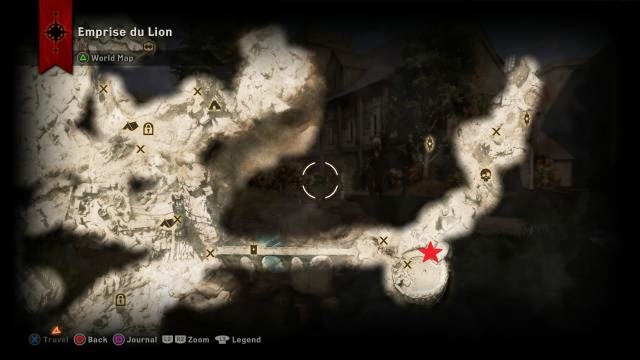
Location


Strategy
  • Recommended Level: 22+
  • Creature Type: High Dragon
  • Location: Emprise du Lion
  • HP: ~311,000
  • Resistance: Fire
  • Weakness: Cold
  • Immune: all disabling effects
  • Abilities:
    • Armored: Allows a dragon to generate Guard.
    • Berserk: A devastating 40-meter area-of-effect attack utilizing the dragon’s elemental ability.
    • Matriarch: The dragon summons dragonlings to join the fight.
    • Fire: The dragon inflicts fire elemental damage; it can be countered by cold.
Damaging the limbs of a dragon so that it is severely bleeding will prevent the dragon from performing swipes with that limb, making life easier for melee characters. Damaging a pair of limbs will cause the dragon to fall down to that side, opening it up for increased damage and preventing it from attacking for a duration. 

Rewards :

Dukes Mane icon Duke's Mane
Icon needed Superior Guard Belt
Icon needed Walking Death
Icon needed Masterwork Battlemage Armor
  • Schematic: Keeper Robe
  • X Pure Dragon Blood
  • X Dragon's Tooth
  • X Dragon Webbing
  • X Dragon Scales
  • X Dragon Bone

Find All Dragon , Dragon Age : inquisition Ninth Dragon The Kaltenzahn

http://hanomangame.blogspot.com/
The Kaltenzahn is one of the ten high dragons encountered in Dragon Age: Inquisition. It lives in Emprise du Lion. Kaltenzahn is one of the 10 High Dragons in Dragon Age 3: Inquisition. You will acquire the Wyrmslayer Trophy/Achievement if you kill all ten of them.

Location 
 
 
STRATEGY
  • Recommended Level: 21+
  • Creature Type: High Dragon
  • Location: Emprise du Lion
  • Resistance: Cold
  • Vulnerablity: Fire
  • Abilities:
    • Armored: Allows a dragon to generate Guard.
    • Matriarch: The dragon summons dragonlings to join the fight.
    • Cold: The dragon inflicts cold elemental damage; it can be countered by fire.
Damaging the limbs of a dragon so that it is severely bleeding will prevent the dragon from performing swipes with that limb, making life easier for melee characters. Damaging a pair of limbs will cause the dragon to fall down to that side, opening it up for increased damage and preventing it from attacking for a duration.


REWARD : 


Caliban icon Caliban
Unique belt icon Superior Potions Belt
Icon needed Amulet of Power (Varric)
Masterwork Scout Armor icon Masterwork Prowler Armor
  • X Pure Dragon Blood
  • X Dragon's Tooth
  • X Dragon Webbing
  • X Dragon Scales
  • X Dragon Bone

Find All Dragon , Dragon Age : Inquisition Eighth Dragon Hivernal

 
Hivernal is one of the 10 High Dragons in Dragon Age 3: Inquisition. You will acquire the Wyrmslayer Trophy/Achievement if you kill all ten of them.

Location
http://hanomangame.blogspot.com/

Strategy

This is a relatively easy fight to win if you're equal to level 19 enemies. You can only access this area if you have completed the rebuilding operations in Emprise du Lion.
Fire vulnerability, immune to slow/disabling effects. Cold Resistant. Perceptive (this dragon will target mages).
During the battle the dragon will take several liftoffs and landings that deal major damage. Keep moving around the circular edges of the battle field to avoid this.
Recommended 2 mages/2 warriors.
Open battle field without choke points or cover.
  • Recommended Level: 19+
  • Creature Type: High Dragon
  • Resistance: Cold
  • Vulnerablity: Fire
  • Abilities:
    • Berserk: A devastating 40-meter area-of-effect attack utilizing the dragon’s elemental ability.
    • Cold: The dragon inflicts cold elemental damage; it can be countered by fire.
Damaging the limbs of a dragon so that it is severely bleeding will prevent the dragon from performing swipes with that limb, making life easier for melee characters. Damaging a pair of limbs will cause the dragon to fall down to that side, opening it up for increased damage and preventing it from attacking for a duration.

Reward :

Unique belt icon Superior Grenades Belt
Icon needed Amulet of Power (Iron Bull)
Staff of the Void icon Staff of the Void
Masterwork Vanguar Mail icon Masterwork Battlemaster Armor
  • X Pure Dragon Blood
  • X Dragon's Tooth
  • X Dragon Webbing
  • X Dragon Scales
  • X Dragon Bone

Find All Dragon , Dragon Age : Inquisition seventh Dragon Sandy Howler

 
Sandy Howler is one of the 10 High Dragons in Dragon Age 3: Inquisition. You will acquire the Wyrmslayer Trophy/Achievement if you kill all ten of them.

  • Recommended Level: 20+ 
  • HP: ~246,000 
  • Resistance: Fire 
  • Weakness: Cold
  • Creature Type: High Dragon
  • Abilities:
    • Armored: Allows a dragon to generate Guard.
    • Matriarch: The dragon summons dragonlings to join the fight.
    • Fire: The dragon inflicts fire elemental damage; it can be countered by cold.
Location :  
 
Rewards: 
  • Robes of the High Keeper, 
  • Superb Stamina Amulet, 
  • Armor of the Knights-Divine, 
  • Amulet of Power (Varric), 
  • Frost Rune
  • Pure Dragon Blood,
  • Dragon Bone, 
  • Dragon Webbing, 
  • Dragon Scales,
  • Dragon Bone
Damaging the limbs of a dragon so that it is severely bleeding will prevent the dragon from performing swipes with that limb, making life easier for melee characters. Damaging a pair of limbs will cause the dragon to fall down to that side, opening it up for increased damage and preventing it from attacking for a duration.

Find All Dragon , Dragon Age : inquisition sixth Dragon Vinsomer

 
Vinsomer is one of the ten high dragons encountered in Dragon Age: Inquisition. This dragon is encountered on Dragon Island; the western area of the Storm Coast.
Vinsomer "breathes" electricity instead of fire, dealing electricity damage. It is therefore resistant to electricity damage, but vulnerable to spirit. Its methods of attack are similar to most other dragons, but its unique skill is a mobile version of Static Cage that becomes "attached" to each party member with a damage-over-time effect dealing electricity-based damage every 3-4 seconds for 20 seconds. Any character that crosses within the field of another receives increased damage which stacks. the first time you spot Vinsomer he'll be busy fighting a giant on a beach in the Storm Coast. To challenge the dragon yourself, you'll need to clear out the camp marked on the map and then use an abandoned boat to reach the nearby island that Vinsomer calls home.


Dragon Island

In order to reach Dragon Island, the Red Water quest must be completed.

Strategy

Vinsomer's stats are as follows:
  • Level 19
  • 226288 HP (Nightmare difficulty)
  • 59 Armor
  • Greater Electricity Resistance
  • Spirit Vulnerability
  • Immunity: All Disabling Effects
  • Immunity: Slowed
  • Perceptive
Offensive
  • Characters with high Guard Damage Bonus, from skills or weapons, are needed (preferably Warriors).
  • The use of Spirit Runes will aid in exploiting the dragon's weakness, though Dragon Runes are a better substitute, in general, for dragon hunting.
  • Mages should use staves with any element type other than Electricity-based damage.
Defensive
  • Dispel removes the Static Cage effect from party members. Note that the damage from Static Cage can interrupt the casting of Dispel, so timing is important.
  • Electricity Resistance Tonics can prove useful throughout the battle.
  • Warriors with the Shield Wall talent can absorb most damage inflicted as long as Stamina is sufficient.

Rewards

  • 3000 Influence
  • 4 Power
  • Icon needed In Peace, Vigilance
  • Icon needed Wyvern Tooth
  • 1 Master Dragon-Slaying Rune (Schematic)
  • Superb Ring of Flanking
  • 1 Dragon Gland
  • 4-5 Pure Dragon Blood
  • 1-3 Dragon's Tooth
  • 6-10 Dragon Webbing
  • 6-9 Dragon Scales
  • 7-10 Dragon Bone

Find All Dragon , Dragon Age : inquisition fifth Dragon The Greater Mistral

 
The Greater Mistral is one of the ten high dragons encountered in Dragon Age: Inquisition. It lives in the Emerald Graves.

Location

Strategy

It's stats are as follows:
  • Level 17
  • 188840 HP (Nightmare difficulty)
  • 52 Armor
  • Greater Cold Resistance
  • Fire Vulnerability
  • Immunity: All Disabling Effects
  • Immunity: Slowed
  • Perceptive
The Greater Mistral is a level 17 ice dragon. It breathes ice instead of fire, dealing cold damage. The dragon is resistant to cold damage and vulnerable to fire.
In preparation, it's a good idea to equip the party with armor and accessories that grant resistance to cold damage. Completing The Cold Endured side-quest in the Forbidden Oasis can further increase The Inquisitor's cold resistance stats. Using weapons, accessories, and runes that increase fire damage is recommended for the fight, as well. Consider including a mage in the party that can cast fire-based spells.

Rewards

  • 3000 Influence
  • 5 Power
  • In War Victory icon In War, Victory
  • Icon needed Gift of the Talons
  • Helm of the Inquisitor icon Helm of the Inquisitor
  • Amulet of Power (Sera only)
  • 1 Dragon Gland
  • 4 Pure Dragon Blood
  • 2-3 Dragon's Tooth
  • 5-9 Dragon Webbing
  • 5-6 Dragon Scales
  • 6-7 Dragon Bone

Find All Dragon , Dragon Age : inquisition Fourth Dragon Gamordan Stormrider

The Gamordan Stormrider is one of the ten high dragons encountered in Dragon Age: Inquisition. It is located in the Crow Fens; the northeast area of the Exalted Plains. In order to access the Crow Fens, the Gain Access to Ghilan'nain's Grove war table operation must be completed.
Location

Strategy

  • Recommended Level: 13+
  • Creature Type: High Dragon
  • Resistance: Electricity
  • Vulnerablity: Spirit
  • Abilities:
    • Electricity: The dragon inflicts electrical elemental damage; it can be countered by spirit.
Gamordan Stormrider "breathes" electricity instead of fire, dealing electricity damage. It is therefore resistant to electricity damage, but vulnerable to spirit.
The greatest challenge of this fight is to avoid standing in any bodies of water. The encounter takes place in a swampy marsh and the water is highly conductive to the dragon's electricity attacks. Not only does the water allow for an increase in the range of the dragon's lightning breath attacks, but it also increases the duration for which each attack lasts. 
The fight against the Gamordan Stormrider is one of the least-eventful dragon encounters in Dragon Age: Inquisition. Unlike the Frostback, the Northern Hunter doesn’t move around all that much, and its infrequent movement makes it easy for players to line-up characters’ most-powerful attacks.
Just be sure to tell your archers/mages to keep running outside his melee range and make sure no one in the party is standing in the water while it’s electrified. The amplified electric damage will make quick work of your party, even if you’ve got some decent gear and a few levels on the beast.

Reward

  • Enhanced Grenades Belt
  • Bianca Aiming II (Enhanced) (Schematic)
  • Bleeder of Souls icon Lady Jocasta's Revenge
  • Superb Amulet of Dexterity
  • 7 Intense Dragon Blood
  • 1-2 Dragon's Tooth
  • 1 Dragon Webbing
  • 1-4 Dragon Scales
  • 3-5 Dragon Bone
  • 1 Dragon Gland

Find All Dragon , Dragon Age : inquisition Third Dragon Abyssal High Dragon

The Abyssal High Dragon is one of the 10 High Dragons in Dragon Age 3: Inquisition. You will acquire the Wyrmslayer Trophy/Achievement if you kill all ten of them. To fight this dragon you must complete the quest: Sharper White Claws, given to you by Frederic. This is the final quest Frederic gives you and you must complete all of them before you can summon the dragon. To summon The Abyssal High Dragon, head to The Wastes in The Western Approach and put down the 5 traps you obtained from the quest mentioned above to summon the dragon.You Must complete quest chain that begins with “Draconology” first.

Location

Strategy

The dragon does fire damage, has a high resistance against fire and cold vulnerability. She snaps at her opponents as well as spits fire. Best way to fight her is with a mage with cold abilities and/or a cold damage staff.
  • HP: ~135,000
  • Resistance: Fire
  • Weakness: Cold
  • Recommended Level: 14+
  • Creature Type: High Dragon
  • Immune: Weakness, all disabling effects
  • Abilities:
    • Armored: Allows a dragon to generate guard.
    • Fire: The dragon inflicts fire elemental damage; it can be countered by cold.

Rewards

  • 189 Gold
  • 1 Nameless Blade
  • 1 Amulet of Power for Solas
  • 2 Jade
  • 1 Superb Ring of Armor Penetration
  • 1 Ivory Halla Figurine
  • 1 Dragon Gland
  • 12 Intense Dragon Blood
  • 2 Dragon's Tooth
  • 1 Dragon Webbing
  • 5 Dragon Scales
  • 5 Dragon Bone

Find All Dragon , Dragon Age : inquisition Second Dragon Northern Hunter

The Northern Hunter is one of the ten high dragons encountered in Dragon Age: Inquisition. It lives in Crestwood. Must complete “Still Waters” quest chain first

Location


Abilities:

The Northern Hunter will use a number of lightning-based attacks on the Inquisitor and companions.
  • Breath Weapon: She will breathe out a burst of lightning that hits quite hard and leaves a lingering area of effect behind. Many companions will not move out of this and should be moved by hand.
  • Lightning Charge: Periodically, she will infuse the party with a damaging effect that will hit allies nearby. This can quickly destroy your ranged companions as they will probably be standing near each other. Spread out to counter this effect.
  • Vortex: Occasionally, she will rear up on her legs, beat her wings quickly, and pull all companions into melee range with strong winds. This is usually followed with Lightning Charge, meaning your allies can quickly kill each other if they don't scatter as soon as vortex finishes.
  • Like other high dragons, she will use a tail whip, bite and claws to deal damage, and will sometimes leap away from melee characters to turn on them and breathe.
The Northern Hunter is immune to burning, freezing, paralyze, sleeping, stunning, and lightning damage. She does take damage from fire, but will not burn. Poison, bleeding, and sundering all seem to work fine, however.
  • HP: ~118,000
  • Resistance: Electricity
  • Weakness: Spirit
  • Recommended Level: 13+
  • Creature Type: High Dragon
  • Abilities:
    • Berserker: A devastating 40-meter area-of-effect attack utilizing the dragon’s elemental ability.
    • Electricity: The dragon inflicts electrical elemental damage; it can be countered by spirit.
Damaging the limbs of a dragon so that it is severely bleeding will prevent the dragon from performing swipes with that limb, making life easier for melee characters. Damaging a pair of limbs will cause the dragon to fall down to that side, opening it up for increased damage and preventing it from attacking for a duration. 

Rewards: 
  •  In Death, Sacrifice, 
  • Enhanced Guard Belt,
  • Inquisitor Hat Schematic,  
  • Amulet of Power (Iron Bull),  
  • Superb Ring of Life-Drain
  • Intense Dragon Blood,  
  • Dragon’s Tooth,  
  • Dragon Webbing, 
  • Dragon Scales,  
  • Dragon Bone
                                               

Find All Dragon , Dragon Age : inquisition First Dragon The Fereldan Frostback


The Fereldan Frostback is one of the ten high dragons encountered in Dragon Age: Inquisition. It can be found in Lady Shayna's Valley, an area in the northeastern part of the Hinterlands north of Dusklight Camp and just east of Redcliffe. Reaching its nest requires traveling through a cave near Dusklight camp.
  • HP: ~105,000
  • Resistance: Fire
  • Weakness: Cold
  • Recommended Level: 12+
  • Creature Type: High Dragon
  • Location: The Hinterlands (Lady Shayna's Valley)
  • Resistance: Fire
  • Vulnerablity: Cold
  • Abilities:
    • Matriarch: The dragon summons dragonlings to join the fight.
    • Fire: The dragon inflicts fire elemental damage; it can be countered by cold.
location :


Strategy

It is recommended to face this dragon at levels 10 to 13. It is recommended to have anti-dragon equipment such as armor with fire resistance and weapons that deal bonus damage to dragons. The Fereldan Frostback is naturally resistant to Fire and vulnerable to Cold. It is immune to all magical and physical debilitations. Your party should consist of at least a Warrior, a Mage and a Rogue, preferably one with daggers. Your mage should also have at least 4 to 5 points invested in Spirit. You can bring any potion at your own discretion. There are four stages to combat;
  • First Stage. The dragon will circle around the initial area destroying the top of the central spire by smashing into it. Upon seeing your party it will start to periodically bombard you. The first fireballs will be coming directly above you so try to dodge them and get close to the central spire. The dragon will change her path when you are far enough in. Standing behind the spire will protect you from this new wave of fireballs. You can also put in some hits if you're a Mage or a Rogue with a bow. After a few rounds, she will eventually fly and land in the next area. If somehow you are caught off-guard by a wild fireball, you have time to cast Barrier, the fireball takes time to travel.
  • Second Stage. The dragon has landed, this is where the real fight begins. Get your Warrior in front of the dragon (there is no use Taunting it) and all ranged members to the sides as far as possible from the dragon. Rogues with daggers should be at the back to maximize damage. The dragon has multiple targetable parts, with her head taking the most damage (needs confirmation), dealing enough damage to any leg will force her to jump to the opposite side of that leg and face perpendicular to her previous position, i.e. you hurt the left leg enough, it jumps to its right. When it does so, re-position your whole team, Warrior in front, Mages and Archers to the side, Rogue with daggers behind. This positioning ensures that only your warrior will be hit by breath attacks, you won't get pulled in by the vortex, and your party won't get stomped on. Though it can't be taunted, it will still attack the party member with the greatest threat generation, in this case your warrior wearing heavy armor. Cast Barrier whenever possible on the Warrior or any member who needs it the most.
  • Third Stage. When you cut its health to 50% (Confirmed), it will take to the skies again. It will throw fireballs and breathe fire down a path, this attack is a little tricky to avoid as it is faster than the fireball and has a wide AoE. It will land on a ledge and call dragonlings to attack you. Do not worry about fire breaths from the dragon, take out all the dragonlings. It will return to the field after killing all the dragonlings. Back to Second Stage, positioning. Taking it down to 35% to 40% will make fly to a ledge, dragonlings will appear again. The dragon will roar occasionally, it will stun your entire party for a few seconds.
  • Final Stage. Upon reaching 20-25% health (Confirmed), it will proceed to the final area. Climb up the hill by following the path. If somehow you can't get to her, your party can. The dragon will face you to the bitter end, no flying, no minions, your party against her. This area is smaller than the previous one so you might get caught in the vortex and get KO'd instantly by a wild fire breath attack. She will also roar, get a few hits in, but since your party is far apart, you're only likely to lose one member if she follows up with a breath attack after a roar. Once you kill her, loot her remains (dragon skull) and claim the Landmark. 
Rewards:
  • Superior Belt of Focus,  
  • Grand Enchanter's Staff,  
  • Superb Amulet of Constitution,
  • Intense Dragon Blood,  
  • Dragon’s Tooth,  
  • Dragon Webbing, 
  • Dragon Scales,
  • Dragon Bone